Learn HTML Basics

Get a solid foundation in computer programming by reading our comprehensive tutorial,
Learn the Fundamentals of Progarmming The Building Blocks of Computer Programming.
Concepts:
1. Introduction to HTML
HTML (HyperText Markup Language) is a markup language used to structure content for the web. HTML elements are used to describe the structure and content of web pages.
An HTML file consists of a series of elements, which are represented by tags. These tags are used to mark up the content of the page, including headings, paragraphs, lists, links, and more.
HTML is one part of building a beautiful website. You can use CSS (Cascading Style Sheets) to control the appearance of your HTML elements, and JavaScript to add interactivity and dynamic behavior to your page.
How to write code for HTML
1. To write HTML code, you will need a text editor. There are many text editors available, both free and paid. Some popular options include Notepad++, Sublime Text, and Atom.
2. Once you have a text editor installed, you can create a new HTML file by selecting "File > New" from the menu and then saving the file with an .html extension.
3. Once you have write your html code, then open the HTML file, it will open your browser and you can see your result there
Why to Learn HTML?
It is the foundation of the World Wide Web and is used to create and display the content that you see when you access a webpage.
HTML is the basis for all web development and is used to create the structure and content of webpages. If you want to learn how to build websites or web applications, knowing HTML is essential.
HTML is used by millions of websites and web applications around the world, making it a valuable skill to have in today's digital economy.
Among all these, HTML is easy to learn
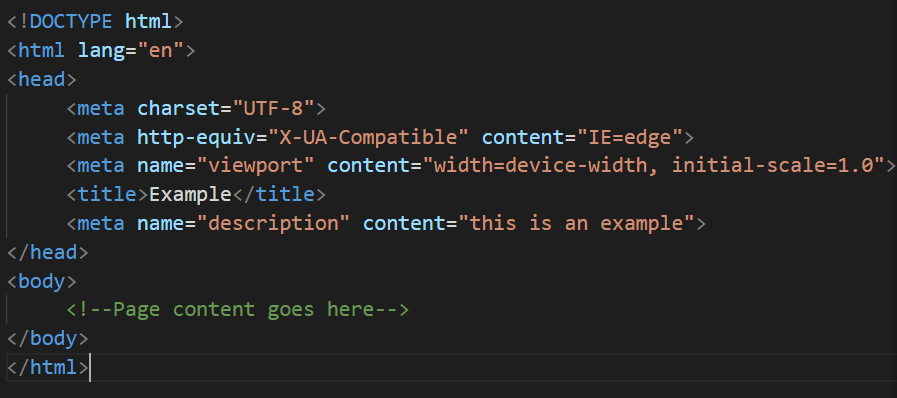
2. HTML Document Outline
In HTML, the 'html', 'head', and 'body' tags are used to structure the content of a webpage.
The 'html' tag is the root element of an HTML document and is used to enclose all the content of the page.
The 'head' element is a container for metadata (information about the document, such as its title, scripts, and style sheets) and is placed within the html element, but before the body element.
The 'body' element contains the main content of the webpage and is also placed within the html element, following the head element
<!DOCTYPE html>
<html>
<head>
<title>Page Title</title>
</head>
<body>
<!-- Page content goes here-->
<h1>Hello Welcome to webdevmonk</h1>
<p>webdevmonk is an online learning platform for the developers</p>
</body>

</html>
The DOCTYPE declaration is used to specify the type of document being used. In this case, <!DOCTYPE html> indicates that the document is an HTML5 document.
The DOCTYPE declaration is not an HTML tag, but it is an important part of any HTML document and must be included at the beginning of the document, before the 'html' tag. It tells the web browser which version of HTML the document is written in and how to interpret the HTML code.
The 'title' element, which is placed within the head element, specifies the title of the document, which is displayed in the browser's title bar or tab.
3. HTML Comments
In HTML, you can use comments to add notes or explanations to your code. Comments are ignored by the web browser and are not displayed on the webpage. They are useful for explaining the purpose of a particular piece of code or for temporarily disabling a piece of code without deleting it.
<!-- This is an HTML comment -->
<!-- This is
multi line comment
-->
It's a good practice to use comments in your HTML code to make it easier to understand and maintain.
4. HTML Page Information
There are several HTML tags that you can use to add information to your webpage. The most common ones are:
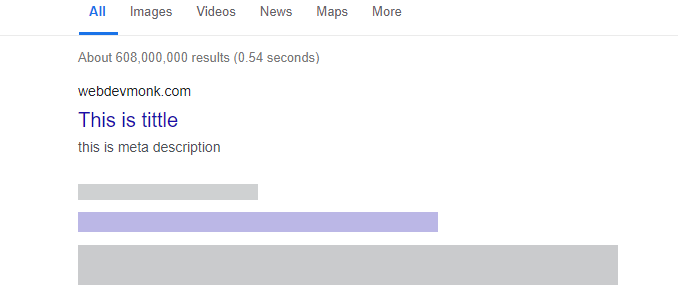
'title': The 'title' element specifies the title of the document and is placed within the head element. The title is displayed in the browser's title bar or tab and is also used by search engines to identify the content of the webpage.
'meta': The meta element is used to provide metadata about the webpage, such as a description or keywords for search engines. In HTML, it is placed within the head tag only and has various attributes that can be used to specify the metadata.
<meta name="description" content="This is a description of the webpage">
<meta name="keywords" content="HTML, CSS, JavaScript">
In HTML, the 'link', 'base', 'style', and 'script' tags are used to add external resources or styles to a webpage.
The 'link' tag is used to link to external resources, such as style sheets or favicons. It is placed within the head element
<link rel="stylesheet" href="styles.css">
<link rel="shortcut icon" href="favicon.ico">
The 'base' tag is used to specify a base URL for all the links on a webpage. It is also placed within the head element and has an 'href' attribute that specifies the base URL.
<base href="https://www.example.com/">
The style tag is used to add styles to a webpage. It is also placed within the head element and has a type attribute
<style type="text/css" media="screen">
body {
background-color: lightblue;
}
</style>
The 'script' tag is used to add scripts (usually written in JavaScript) to a webpage. It can be placed either in the head element or in the body element, depending on when you want the script to be executed.
The script can also be placed directly between the opening and closing script tags.
<!-- external source-->
<script type="text/javascript" src="script.js"></script>

<!-- internal source-->
<script type="text/javascript">
alert("This is an inline script");
</script>
Self Closing Tags:
In HTML, some tags are self-closing, which means that they don't have a closing tag. Instead, they are closed by using a slash (/) at the end of the opening tag.
For example, the 'img' tag is used to add an image to a webpage and is a self-closing tag
<img src="image.jpg" alt="Description of the image">
<br>
<hr>
<input type="text" value="Enter your name">
5. HTML Document Structure
In HTML, there are several tags that you can use to structure and format your content. Some of the most commonly used tags are:
1. 'h1' to 'h6': The 'h1' to 'h6' tags are used to define headings on a webpage. The h1 tag represents the highest level of heading, while h6 represents the lowest level. Headings are used to organize the content of a webpage and are often displayed in larger and bolder text than the rest of the content.
<h1>This is a level 1 heading</h1>
<h2>This is a level 2 heading</h2>
<h3>This is a level 3 heading</h3>
<h4>This is a level 4 heading</h4>
<h5>This is a level 5 heading</h5>
<h6>This is a level 6 heading</h6>
2. 'p': The 'p' tag is used to define a paragraph of text. It is often used to enclose blocks of text on a webpage.
<p>This is a paragraph of text.</p>
<p>This is another paragraph of text.</p>
3. 'div': The 'div' tag is used to define a division or section of content on a webpage. It is a block-level element that can contain other elements and is often used to group related content together.
<div>
<h2>This is a heading within a division</h2>
<p>This is a paragraph of text within the division.</p>
</div>
4. 'span': The 'span' tag is used to apply styles to a small part of a text or to group inline elements together. It is an inline element that can be used within a block-level element, such as a paragraph.
<p>This is a <span style="color: red;">red</span> paragraph of text.</p>
5. 'br': The 'br' tag is used to insert a line break in the text. It is a self-closing tag and doesn't have a closing tag.
<p>This is a line of text<br>
This is another line of text </p>
6. 'hr': The 'hr' tag is used to insert a horizontal rule (a line) on a webpage. It is a self-closing tag and doesn't have a closing tag.
<p>Before the horizontal line<hr> </p>
<p>After the horizontal line</p>
6. HTML Text Markup
In HTML, we have some tags to markup tha text.
1. <strong>: The <strong> tag is used to indicate that the text within it is important, and is typically displayed in a bold font.
2. <em>: The <em> tag is used to indicate that the text within it is emphasized, and is typically displayed in an italic font.
3. <b>: The <b> tag is used to make the text within it bold. It is similar to the <strong> tag, but does not convey any additional meaning.
4. <i>: The <i> tag is used to make the text within it italic. It is similar to the <em> tag, but does not convey any additional meaning.
5. <blockquote>: The <blockquote> tag is used to indicate that the text within it is a block quote, and is typically displayed with indents on the left and right sides.
6. <q>: The <q> tag is used to indicate that the text within it is a short quotation, and is typically displayed with quotation marks around it.
7. <abbr>: The <abbr> tag is used to indicate that the text within it is an abbreviation or acronym, and allows you to provide the full expansion of the term using the title attribute.
8. <pre>: The <pre> tag is used to indicate that the text within it is preformatted and should be displayed as-is, with whitespace preserved.
9. <code>: The <code> tag is used to indicate that the text within it is a piece of code, and is typically displayed in a monospace font.
10. <del>: The <del> tag is used to indicate that the text within it has been deleted, and is typically displayed with a line through it.
11. <ins>: The <ins> tag is used to indicate that the text within it has been inserted, and is typically displayed with an underline.
12. <sub>: The <sub> tag is used to indicate that the text within it should be displayed as a subscript.
13. <sup>: The <sup> tag is used to indicate that the text within it should be displayed as a superscript.
example
<html>
<head>
<title>HTML Text Markup Examples</title>
</head>
<body>
<h1>HTML Text Markup Examples</h1>
<p>
In this example, we will demonstrate the use of various HTML tags for formatting text.
</p>

<h2>Emphasis Tags</h2>
<p>
The <strong>strong</strong> tag is used to indicate that the text within it is important, and is typically displayed in a bold font.
</p>

<p>
The <em>em</em> tag is used to indicate that the text within it is emphasized, and is typically displayed in an italic font.
</p>

<h2>Bold and Italic Tags</h2>
<p>
The <b>b</b> tag is used to make the text within it bold. It is similar to the <strong>strong</strong> tag, but does not convey any additional meaning.
</p>

<p>
The <i>i</i>tag is used to make the text within it italic. It is similar to the <em>em</em> tag, but does not convey any additional meaning.
</p>

<h2>Quotation Tags</h2>
<p>
The <blockquote>blockquote</blockquote> tag is used to indicate that the text within it is a block quote, and is typically displayed with indents on the left and right sides.
</p>

<p>
The <q>q</q> tag is used to indicate that the text within it is a short quotation, and is typically displayed with quotation marks around it.
</p>

<h2>Abbreviation Tag</h2>
<p>
The <abbr title="Hypertext Markup Language">HTML</abbr> tag is used to indicate that the text within it is an abbreviation or acronym, and allows you to provide the full expansion of the term using the `title` attribute.
</p>

<h2>Preformatted Text Tag</h2>
<p>
The <pre>pre</pre> tag is used to indicate that the text within it is preformatted and should be displayed as-is, with whitespace preserved.
</p>

<h2>Code Tag</h2>
<p>
The <code>code</code> tag is used to indicate that the text within it is a piece of code, and is typically displayed in a monospace font.
</p>

<h2>Deleted and Inserted Text Tags</h2>
<p>
The <del>del</del> tag is used to indicate that the text within it has been deleted, and is typically displayed with a line through it.
</p>

<p>
The <ins>ins</ins> tag is used
</p>

</body>
</html>
By using these tags appropriately, you can create well-structured and easily readable content on the web.
7. HTML Links
In HTML, you can create links to other web pages or to specific locations within the same page using the (anchor) tag.
To create a link to another web page, you need to specify the destination URL using the href attribute
<a href="https://google.com">Google</a>
<<p>Click here to visit another page <a href="../dir1/page1.html">Page 1</a></p>
<<p>Click here to jump to specific section in same page <a href="#mysecton">Section 1</a></p>
<!-- Some content-->
<h2 id="mysection">Section 1</h2>
8. HTML Lists
In HTML, you can create lists using the <ul> (unordered list) and <ol> (ordered list) tags.
You can also use the <dd> (definition description) and <dl> (definition list) tags to create definition lists
An unordered list is a list of items that are not ordered in any specific way.
To create an unordered list, you can use the <ul> tag and nest individual list items within <li> (list item) tags.
<ul>
<li>Item 1 </li>
<li>Item 2 </li>
<li>Item 3 </li>
</ul>
This will create a list with bullet points next to each item
- Item 1
- Item 2
- Item 3
An ordered list is a list of items that are ordered in a specific way, such as numerically or alphabetically. To create an ordered list, you can use the <ol> tag and nest individual list items within <li> tags.
<ol>
<li>Item 1 </li>
<li>Item 2 </li>
<li>Item 3 </li>
</ol>
This will create a list with numbers next to each item
- Item 1
- Item 2
- Item 3
You can also nest lists within lists to create multi-level lists (useful for dropdown menus)
<ul>
<li>Item 1</li>
<li>Item 2
<ul>
<li>Subitem 1</li>
<li>Subitem 2</li>
</ul>
</li>
<li>Item 3</li>
</ul>
A definition list is a list of terms and their corresponding definitions. To create a definition list, you can use the <dl> tag and nest the terms within <dt> (definition term) tags and the definitions within <dd> tags.
<dl>
<dt>Term 1</dt>
<dd>Definition 1</dd>
<dt>Term 2</dt>
<dd>Definition 2</dd>
<dt>Term 3</dt>
<dd>Definition 3</dd>
</dl>
This will create a definition list with the terms and definitions listed in separate columns:
- Term 1
- Definition 1
- Term 2
- Definition 2
- Term 3
- Definition 3
The <dd> tag is used to indicate the description or definition of the term that precedes it in the list. The <dl> tag is used to define the entire definition list.
9. HTML Forms
In HTML, you can use forms to collect user input. Forms are created using the <form> element, and contain various form elements such as text fields, buttons, and checkboxes.
<form>
<label for="name" >Name: </label><br>
<input type="text" id="name" name="name"><br>
<label for="email">Email :</label><br>
<input type="email" id="email" name="email"><br>
<input type="submit" value="Submit">
</form>
Forms can also contain other elements such as radio buttons, checkboxes, and dropdown menus
<form>
<label for="name">Name:</label><br>
<input type="text" id="name" name="name"><br>
<label for="email">Email:</label><br>
<input type="email" id="email" name="email"><br>
<label for="gender">Gender:</label><br>
<input type="radio" id="male" name="gender" value="male">
<label for="male">Male</label><br>
<input type="radio" id="female" name="gender" value="female">
<label for="female">Female</label><br>
<label for="hobbies">Hobbies:</label><br>
<input type="checkbox" id="hobby1" name="hobby" value="reading">
<label for="hobby1">Reading</label><br>
<input type="checkbox" id="hobby2" name="hobby" value="music">
<label for="hobby2">Music</label><br>
<label for="country">Country:</label><br>
<select id="country" name="country">
<option value="usa">India</option>
<option value="canada">Canada</option>
<option value="mexico">Mexico</option>
</select><br>
<input type="submit" value="Submit">
</form>
HTML Buttons:
In HTML, you can create buttons using the <button> element. A button can be used to trigger an action when clicked by the user, such as submitting a form or navigating to a different page.
To create a button in HTML, you can use the 'button' element or the 'input' element with the type attribute set to button.
<button>Click me</button>
<input type="button" value="Click me">
We can style this buttons as we want. Using Java Script, we can make this button to perform an action.
<style>
#myBtn{
padding:9px;
border-radius: 18px;
background-color: black;
color:white;
}

</style>
<button id="myBtn">Click me</button>
<script>
let button = document.getElementById("myBtn");
button.onclick = function(){
alert("Hi");
}
</script>
label:
In HTML, the 'label' element is used to create a label for an input element. The label element can be used to provide a description for the input element, or to group related elements together.
<label for="email">Email:</label>
<input type="email" id="email" name="email">
10. HTML Tables
HTML tables are used to present data in a tabular format on a web page. Tables are made up of rows and columns, and each cell in the table can contain text or other content.
To create a table in HTML, you can use the 'table' element, which consists of one or more 'tr' (table row) elements, each of which contains one or more 'td' (table cell) elements.
<table>
<tr>
<td>Row 1, Cell 1</td>
<td>Row 1, Cell 2</td>
</tr>
<tr>
<td>Row 2, Cell 1</td>
<td>Row 2, Cell 2</td>
</tr>
</table>
By applying some style on this we can make this more like an accurate table
<style>
table {
border-collapse: collapse;
border: 1px solid black;
}

td {
padding: 10px;
border: 1px solid black;
text-align: center;
}

th {
background-color: lightgray;
font-weight: bold;
}
</style>
<table>
<tr>
<td>Row 1, Cell 1</td>
<td>Row 1, Cell 2</td>
</tr>
<tr>
<td>Row 2, Cell 1</td>
<td>Row 2, Cell 2</td>
</tr>
</table>
| Row 1, Cell 1 | Row 1, Cell 2 |
| Row 2, Cell 1 | Row 2, Cell 2 |
11. HTML Images and Image Map
HTML images are used to display images on a web page. To add an image to an HTML page, you can use the img element.
<img src="image.jpg" alt="My image">
The 'src' attribute specifies the source of the image, and the 'alt' attribute provides a text alternative for the image in case it cannot be displayed in the browser.
You can also use the 'width' and 'height' attributes to specify the dimensions of the image in pixels.
<img src="image.jpg" alt="My image" width="200" height="100">
An image map is a way to create multiple clickable areas on an image. To create an image map in HTML, you can use the 'map' and 'area' elements.
<img src="image.jpg" alt="My image" usemap="#map1">

<map name="map1">
<area shape="rect" coords="0,0,100,100" href="area1.html" alt="Area 1">
<area shape="circle" coords="200,200,50" href="area2.html" alt="Area 2">
</map>
12. HTML Chatacter Entities
HTML character entities are used to display special characters on a web page that may not be easily entered using a keyboard or may not be supported by the character encoding of the page.
Here is a list of some common HTML character entities:
< : Less than sign <
> : Greater than sign >
& : Ampersand &
" : Double quotation mark "
' : Single quotation mark '
© : Copyright symbol ©
® : Registered trademark symbol ®
<p>Copyright &© 2021</p>
<p>
<head> The head tag </head>
</p>
Copyright &© 2021
<head> The head tag </head>
13. HTML <br> and
The <br> element is used to insert a line break in an HTML document. It is an empty element, which means that it does not have a closing tag and does not contain any content.
<p>This is some text.<br>This is more text on a new line.</p>
This will display the text "This is some text." on one line, and "This is more text on a new line." on the next line.
The '& ' character entity is used to insert a non-breaking space in an HTML document. It is a special character that represents a space that will not be collapsed, even if it appears at the end of a line.
<p>This is some text. This is more text on the same line.</p>
This will display the text "This is some text. This is more text on the same line." on one line, with three non-breaking space between "text." and "This".
14. HTML Core Attributes
HTML elements have some attributes to provide additional information about the element.
These are useful for java script to get the specific element or css to style the element.
1. 'id': This attribute assigns a unique identifier to an element. The id attribute is used to identify an element and to create a link to that element from other elements on the page or in other documents.
2. 'class': This attribute assigns one or more class names to an element. The class attribute is used to apply styles to elements in CSS.
3. 'style': This attribute allows you to specify inline styles for an element. The style attribute is used to apply specific styles to an element, rather than using a separate stylesheet.
4. 'title': This attribute provides additional information about an element. The title attribute is usually displayed as a tooltip when the mouse pointer hovers over the element.
5. 'lang': This attribute specifies the language of the element's content. The lang attribute is used to specify the language of an element's content and to help search engines and screen readers understand the content.
6. 'accesskey': This attribute defines a shortcut key to activate or focus an element. The accesskey attribute is used to specify a shortcut key that can be used to activate or focus an element.
Note that these attributes are just a small subset of the attributes available in HTML.
15. HTML Language Attributes
HTML language attributes are used to specify the language of an element's content and to help search engines and screen readers understand the content.
the most commonly used HTML language attributes are
1. 'lang': This attribute specifies the language of the element's content.
2. 'xml:lang': This attribute is similar to the lang attribute, but is used specifically in XML documents.
3. 'hreflang': This attribute specifies the language of the linked document. The hreflang attribute is used in the a element to specify the language of the linked document.
16. HTML Semantic Elemets
These tags are most important for SEO(Search Engine Optimization). Consider this tags to use for your HTML document.
They provide additional meaning and structure to the content of a web page, making it easier for both humans and machines to understand the content and context of the page.
1. 'header': This element represents the header of a section or page. It typically contains the title or heading of the section or page, as well as other elements such as logos or navigation links.
2.' nav': This element represents a section of the page that contains navigation links. It is used to indicate the primary navigation links for a web page.
3. 'article': This element represents a self-contained piece of content, such as a blog post or news article. It is used to indicate that the content within the element is independent from the rest of the page.
4. 'footer': This element represents the footer of a section or page. It typically contains information such as copyright notices, links to related content, or contact information.
5. 'section': This element represents a generic section of a web page. It is used to group related content together and to provide a heading or title for the section.
6. 'aside': It is often used for sidebars or for content such as advertisements or related links.
<html>
<head>
<title>My Blog</title>
</head>
<body>

<header>

<h1>My Blog</h1>

<nav>
<ul>
<li><a href="#">Home</a></li>
<li><a href="#">About</a></li>
<li><a href="#">Contact</a></li>
</ul>
</nav>

</header>

<main>

<article>
<h2>My First Blog Post</h2>
<p>Lorem ipsum dolor sit amet, consectetur adipiscing elit. Duis dictum, odio non fringilla lobortis, turpis risus gravida lorem, nec tincidunt nibh mauris quis erat. Maecenas tincidunt ornare ligula, id vehicula ipsum ornare non. Praesent in nulla sed ligula congue dictum. Aliquam erat volutpat. Sed suscipit, urna vel iaculis scelerisque, diam purus convallis nibh, eget bibendum risus arcu id orci. Proin venenatis, diam in auctor gravida, lectus nibh dictum ipsum, a fringilla lacus enim non lectus.</p>
</article>

<article>
<h2>My Second Blog Post</h2>
<p>Lorem ipsum dolor sit amet, consectetur adipiscing elit. Duis dictum, odio non fringilla lobortis, turpis risus gravida lorem, nec tincidunt nibh mauris quis erat. Maecenas tincidunt ornare ligula, id vehicula ipsum ornare non. Praesent in nulla sed ligula congue dictum. Aliquam erat volutpat. Sed suscipit, urna vel iaculis scelerisque, diam purus convallis nibh, eget bibendum risus arcu id orci. Proin venenatis, diam in auctor gravida, lectus nibh dictum ipsum, a fringilla lacus enim non lectus.</p>
</article>
<footer>
<p>Copyright 2021 My Blog</p>
</footer>

</body>
</html>
17. HTML Window Events
HTML window events allow you to execute JavaScript code in response to user actions such as clicking a button, loading a page, or resizing the window.
1. 'onload': This event is triggered when the browser finishes loading the page.
2. 'onunload': This event is triggered when the user leaves the page or closes the browser window.
3. 'onresize': This event is triggered when the user resizes the browser window.
4. 'onscroll': This event is triggered when the user scrolls the page. It can be used to execute code in response to scrolling, such as updating the position of fixed elements or loading new content as the user scrolls.
5. 'onfocus': This event is triggered when an element receives focus.
6. 'onblur': This event is triggered when an element loses focus
<html>
<head>
<title>My Page</title>
</head>

<body onload="init()">
<!-- Page content goes here -->
<script>
function init() {
// Code to be executed when the page is loaded goes here
alert("The page is fully loaded!");
}
</script>
</body>
</html>
18. HTML Form Events
HTML form events are events that are triggered by actions that occur in an HTML form.
1. 'onsubmit': This event is triggered when the user submits a form. It can be used to execute code when the form is submitted, such as validating the form data or sending the data to the server.
2. 'onreset': This event is triggered when the user resets a form.
3. 'onfocus': This event is triggered when an element within a form receives focus
4. 'onblur': This event is triggered when an element within a form loses focus.
5. 'onchange': This event is triggered when the value of an element within a form is changed.
<form onsubmit="return validateForm()" onreset="resetForm()">
<label for="name">Name:</label><br>
<input type="text" id="name" name="name"><br>
<label for="email">Email:</label><br>
<input type="email" id="email" name="email"><br><br>
<input type="submit" value="Submit">
<input type="reset" value="Reset">
</form>

<script>
function validateForm() {
// Validate form input and return true if the form is valid, false if not
// For example, you could check that the name field is not empty and that the email field is a valid email address
// If the form is invalid, you can display an error message to the user
}

function resetForm() {
// Reset the form to its default state
// For example, you could clear any input fields or reset any selected options
}
</script>
19. HTML Mouse Events
HTML provides several mouse events that you can use to create interactive websites. For example:
1. 'onclick': Triggered when the user clicks on an element
2. 'onmousedown': Triggered when the user presses a mouse button over an element
3. 'onmouseenter': Triggered when the user moves the mouse pointer over an element
4. 'onmouseleave': Triggered when the user moves the mouse pointer out of an element
5. 'oncontextmenu': Triggered when the user right-clicks on an element
6. 'onmouseout': Triggered when the mouse pointer leaves an element
7. 'onmouseover': Triggered when the mouse pointer moves over an element
8. 'onmouseup': Triggered when the user releases a mouse button over an element
20. HTML Favicon

A favicon (short for "favorite icon") is a small icon that is displayed in the browser's address bar, bookmark menu, or on the page tab. It is used to represent a website and help users identify and locate it more easily.
<link rel="shortcut icon" type="image/x-icon" href="/path/to/favicon.ico">
Replace /path/to/favicon.ico with the path to your favicon file. The favicon file should be a small image in ICO or PNG format. You can also use a transparent PNG file for the favicon, which allows it to blend in with the background color of the browser's address bar.
It is a good idea to create a favicon that is at least 16x16 pixels in size, since it may be displayed at that size in some browsers.
21. HTML File Paths
In HTML, file paths are used to link external files such as stylesheets, images, and scripts to an HTML document.
There are two types of file paths:
1. 'Absolute file paths': An absolute file path is a complete URL that includes the domain name. For example:
<link rel="stylesheet" href="https://www.example.com/css/styles.css">
'2. Relative file paths': A relative file path points to a file relative to the current page. For example:
<img src="images/logo.png">
<a href="about.html">About</a>
<a href="about/about.html">About</a>
Thank You
Thank you for taking the time to read our HTML tutorial. We hope that it was helpful to you in your learning journey.