Flutter Basics

Get a solid foundation in computer programming by reading our comprehensive tutorial,
Learn the Fundamentals of Progarmming The Building Blocks of Computer Programming.
Concepts:
11. Flutter Asynchronus Programming
17. Flutter Integration with Native Code
18. Flutter Internationalization
1. Flutter Introduction
Flutter is a most popular open-source mobile application development framework created by Google. It uses the Dart programming language to build cross-platform apps that can run on Android, iOS, and the web.
One of the main benefits of Flutter is that it allows developers to create a single codebase that can be used to build apps for multiple platforms. This means that you can write code once and use it to create apps that run on Android, iOS, and the web, without having to maintain separate codebases for each platform.
In addition to cross-platform support, Flutter offers a number of other features that make it a popular choice for mobile app development:
Hot reload: Flutter's hot reload feature allows developers to make changes to the code and see the results in real-time, without having to manually stop and restart the app.
Customizable widgets: Flutter includes a wide range of customizable widgets that can be used to build the user interface of an app. These widgets are designed to be fast and efficient, and they can be easily customized to match the look and feel of the app.
Strong testing support: Flutter includes extensive testing support, making it easy to write and run tests for your app.
Overall, Flutter is a powerful framework that allows developers to build high-quality, cross-platform apps quickly and efficiently.
2. Prerequisites
To get started with Flutter, you will need the following
1. A computer with a supported operating system: Flutter supports Windows, Mac, and Linux.
2. A text editor: You will need a text editor to write your Flutter code. Some popular options include Visual Studio Code, Android Studio, and IntelliJ IDEA.
3. The Flutter SDK: You will need to install the Flutter SDK on your computer. You can download the latest version from the Flutter website.
4. A supported development environment: If you want to develop Flutter apps for Android, you will need to install the Android SDK and set up an Android emulator. If you want to develop Flutter apps for iOS, you will need to install Xcode and set up an iOS simulator.
5. Basic knowledge of the Dart programming language: Flutter uses the Dart programming language, so it is helpful to have some basic knowledge of this language before getting started. If you are new to Dart, you can learn more about it on the webdevmonk - dart 45 minutes tutorial'.
3. Flutter Installation
To install Flutter, follow these steps
1. Download the Flutter SDK: Go to the https://docs.flutter.dev/get-started/install website and click the "Download the Flutter SDK" button. This will download a zip file containing the Flutter SDK..
2. Extract the Flutter SDK: Extract the zip file to a location on your computer. This will create a new directory containing the Flutter SDK.
3. Add the Flutter bin directory to your system path: Open your terminal and enter the following command, replacing [PATH_TO_FLUTTER_SDK] with the path to the Flutter SDK on your computer:
export PATH="$PATH:[PATH_TO_FLUTTER_SDK]/flutter/bin"
4. Verify the installation: To verify that Flutter has been installed correctly, enter the following command in your terminal:
flutter doctor
This command will check your system for any dependencies that are required for Flutter development. If there are any missing dependencies, it will provide instructions for how to install them.
4. Flutter Environment Set Up
1. Install a text editor
Flutter uses the Dart programming language, which is easy to learn and familiar to developers who have worked with languages like Java or C#. You will need a good text editor to write your Flutter code. Some popular options include Visual Studio Code, Android Studio, and IntelliJ IDEA.
2. Install the Flutter extension
If you are using Visual Studio Code or Android Studio, you should install the Flutter extension. This extension provides helpful features like code completion, real-time error checking, and formatting for Flutter development.
3. Install the Flutter plugin
If you are using Android Studio, you will need to install the Flutter plugin. This plugin provides integration with the Flutter engine, enabling you to run Flutter apps on your device or emulator.
4. Install the Android SDK
If you want to develop Flutter apps for Android, you will need to install the Android SDK. You can do this through the Android Studio installation process or by downloading the Android SDK separately.
5. Set up an Android emulator:
To test your Flutter app on an Android device, you will need to install an Android emulator. You can use the Android Virtual Device (AVD) Manager, which is included with Android Studio, to create and start an emulator.
6. Install Xcode
If you want to develop Flutter apps for iOS, you will need to install Xcode.
7. Set up an iOS simulator
To test your Flutter app on an iOS device, you will need to install an iOS simulator. You can do this through the Xcode installation process or by opening Xcode and going to Preferences > Components.
Once you have installed all of the necessary software, you should be ready to start developing Flutter apps!
How to write code for flutter?
To write code for a Flutter app, you will need to use the Dart programming language. Dart is an easy-to-learn language that is familiar to developers who have worked with languages like Java or C#.
Here are the basic steps for writing code for a Flutter app
1. Create a new Flutter project
To create a new Flutter project, open a terminal window and enter the following command
flutter create [project_name]
This will create a new directory with the specified project name and generate the basic file structure for a Flutter app.
2. Open the project in your text editor
Open the project directory in your text editor. This is where you will write the code for your Flutter app.
3. Edit the main file
The main file for a Flutter app is 'main.dart', which is located in the 'lib' directory. This file contains the 'main()' function, which is the entry point for the app.
4. Write code
Use the Dart programming language to write code for your Flutter app. Flutter includes a wide range of customizable widgets that you can use to build the user interface of your app.
You can also use this website https://flutlab.io/workspace to write code for flutter in online
5. Test your code
To test your code, run the app in an emulator or on a device. Flutter includes a hot reload feature that allows you to make changes to the code and see the results in real-time, without having to manually stop and restart the app.
5. Flutter First App
Now, let's create a simple hello world app using flutter.
1. Run the following command to create a new Flutter project through terminal
flutter create hello_world
2. This will create a new Flutter project with the following directory structure
hello_world/
├── android/
├── build/
├── ios/
├── lib/
│   ├── main.dart
│   └── ...
├── test/
└── ...
3. Open the 'lib/main.dart' file in your text editor. This is the entry point for your Flutter app.
4. Replace the contents of the 'main.dart' file with the following code
import 'package:flutter/material.dart';

void main() {
     runApp(MyApp());
}

class MyApp extends StatelessWidget {
     @override
     Widget build(BuildContext context) {
     return MaterialApp(
          home: Scaffold(
          body: Center(
          child: Text(
               'Hello, world!',
               style: TextStyle(fontSize: 24, color: Colors.blue),
          ),
          ),
          ),
     );
     }
}
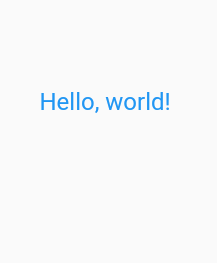
This program defines a 'main' function that calls the 'runApp' function with a new instance of the 'MyApp' class. The 'MyApp' class extends the 'StatelessWidget' class and has a build method that returns a 'MaterialApp' widget. The 'MaterialApp' widget has a home property, which is set to a 'Scaffold' widget. The Scaffold widget has a body property, which is set to a Center widget that displays a Text widget with the message "Hello, world!". 'TextStyle' object of flutter is used to style the Text widget.
Save the file with code and return to the terminal window.
flutter run
5. This will build and run the app on your development machine. You should see the "Hello, World!" text displayed in the app.
Successfully you have created a new "Hello World!" app using Flutter framework
6. Flutter Widgets
In the Flutter framework, a widget is a class that defines the visual elements of an app's user interface. Widgets are used to build the user interface of an app, and they can be composed to create complex user interface elements.
Widgets are lightweight and stateful. They can be used to define the structure of the user interface, as well as the appearance and behavior of the interface elements.
Some examples of common widgets in Flutter include
1. Text: A widget for displaying a short piece of text.
2. Container A box that can contain other widgets.
3. Row and Column: Lay out their children in a horizontal or vertical line.
4. Button: A button that the user can tap to trigger an action.
5. Image: A widget for displaying an image.
There are many more types of widgets available in Flutter, and you can also create your own custom widgets. The Flutter framework provides a large set of pre-designed widgets that you can use to build your app's user interface, and you can also create your own widgets to customize the appearance and behavior of your app.
import 'package:flutter/material.dart';

void main() {
runApp(MyApp());
}

class MyApp extends StatelessWidget {
@override
Widget build(BuildContext context) {
return MaterialApp(
     home: Scaffold(
     appBar: AppBar(
     title: Text('Flutter Widgets Example'),
     ),
     body: Center(
     child: Column(
          mainAxisAlignment: MainAxisAlignment.center,
          children: [
          Text('This is a text widget'),
          ElevatedButton(
               child: Text('Click me'),
               onPressed: () {
               print('Button was clicked');
               },
          ),
          Image.network(
               'https://picsum.photos/250?image=9',
          ),
          ],
     ),
     ),
     ),
);
}
}
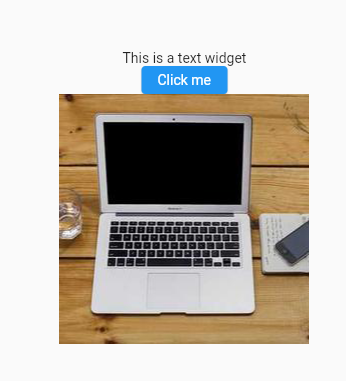
This program displays a text widget, a button widget, and an image widget. The text widget displays a simple string, the button widget has a "Click me" label and prints a message to the console when it is clicked, and the image widget displays an image from a URL.
7. Flutter Layouts
Flutter offers a variety of layout widgets that allow you to build the layout for your app. These layout widgets are used to position and size widgets according to the logic that you specify.
Here is an example of a simple layout in Flutter using the Row and Column widgets
import 'package:flutter/material.dart';

void main() {
runApp(
MaterialApp(
home: MyApp(),
),
);
}

class MyApp extends StatelessWidget {
@override
Widget build(BuildContext context) {
return Scaffold(
body: Row(
children: [
Container(
     color: Colors.red,
     width: 100,
     height: 100,
),
Column(
     children: [
     Container(
          color: Colors.green,
          width: 100,
          height: 100,
     ),
     Container(
          color: Colors.blue,
          width: 100,
          height: 100,
     ),
     ],
),
],
),
);
}
}
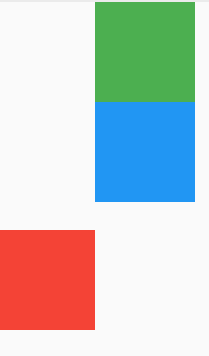
The above flutter example, creates a layout with a red container on the left, and a column of a green container on top of a blue container on the right.
There are many other layout widgets available in Flutter, such as 'Expanded', 'Flex', 'Wrap', 'Flow', 'Stack', 'Card', and more. You can use these widgets to create more complex layouts for your app.
8. Flutter Themes
In Flutter, themes are used to customize the appearance of an app, such as the colors, fonts, and overall visual style. Themes are defined in the 'MaterialApp' widget and can be customized using the 'ThemeData' class.
Here is an example of how to use a theme in a Flutter app
import 'package:flutter/material.dart';

void main() {
runApp(MyApp());
}

class MyApp extends StatelessWidget {
@override
Widget build(BuildContext context) {
return MaterialApp(
theme: ThemeData(
primarySwatch: Colors.blue,
visualDensity: VisualDensity.adaptivePlatformDensity,
),
home: MyHomePage(),
);
}
}

class MyHomePage extends StatelessWidget {
@override
Widget build(BuildContext context) {
return Scaffold(
appBar: AppBar(
title: Text('My App'),
),
body: Center(
child: Text(
'Hello, World!',
style: Theme.of(context).textTheme.headline1,
),
),
);
}
}
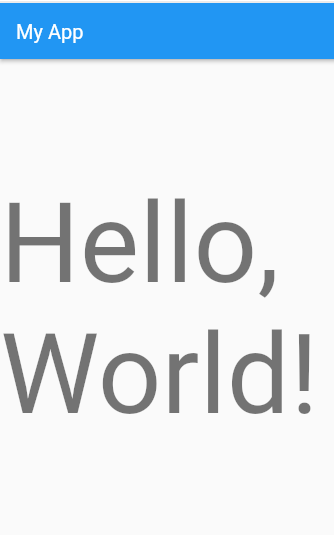
In this example, the 'primarySwatch' property of the 'ThemeData' object is set to 'Colors.blue', which sets the primary color of the theme to blue. The 'visualDensity' property is set to 'VisualDensity.adaptivePlatformDensity', which adjusts the density of the theme to match the platform (e.g. iOS or Android).
You can customize the theme further by setting other properties of the 'ThemeData' object, such as the 'accentColor', 'fontFamily', and 'textTheme'.
9. Flutter State Management
State management in Flutter refers to the technique of managing and propagating changes to the data or state of a widget within a Flutter app.
There are several approaches to state management in Flutter, including
1. InheritedWidget: This is a widget that holds a piece of state and makes it available to its descendants. This is useful for small pieces of state that are needed by many widgets in the app.
2. Provider: This is a package that provides a simple way to manage state and propagate changes throughout the app. It uses InheritedWidget under the hood, but offers a more convenient and flexible API.
3. ScopedModel: This is another package that provides a way to manage state and propagate changes. It is similar to Provider, but it is more opinionated and may be easier to use in certain situations.
4. Redux: This is a pattern for managing state and propagating changes that originated from the Redux library in JavaScript. It is useful for building large, complex apps with predictable state management.
Which state management approach you choose will depend on the needs of your app. For small apps, InheritedWidget or Provider may be sufficient. For larger, more complex apps, BLoC or Redux may be more suitable.
10. Flutter Navigation
In Flutter, navigation refers to the act of moving between screens or pages in an app. Flutter provides a variety of ways to perform navigation, including
1. Navigator: The 'Navigator' widget is a built-in widget that allows developers to define a stack-based architecture for their app's navigation. It's possible to push and pop routes from the 'Navigator' to move between screens.
2. CupertinoPageRoute: This is a route that's designed to work with the iOS-style navigation patterns. It provides a transition animation when moving between screens and supports a "back" button in the app bar.
3. MaterialPageRoute: This is a route that's designed to work with the Android-style navigation patterns. It provides a transition animation when moving between screens and includes a "back" button in the app bar by default.
4. named routes: Developers can also use named routes to navigate between screens in their app. Named routes allow developers to specify a unique name for each screen in their app and navigate to it using the 'Navigator.pushNamed' method.
It's also possible to customize the navigation experience in a Flutter app by creating custom routes and transition animations.
Here's an example of using the Navigator widget and MaterialPageRoute to navigate between screens in a Flutter app
import 'package:flutter/material.dart';

void main() =>runApp(MyApp());

class MyApp extends StatelessWidget {
@override
Widget build(BuildContext context) {
return MaterialApp(
     home: HomeScreen(),
);
}
}

class HomeScreen extends StatelessWidget {
@override
Widget build(BuildContext context) {
return Scaffold(
     appBar: AppBar(
     title: Text('Home'),
     ),
     body: Center(
     child: ElevatedButton(
     child: Text('Go to detail screen'),
     onPressed: () {
          // Navigate to the detail screen when the button is pressed
          Navigator.push(
          context,
          MaterialPageRoute(
               builder: (context) => DetailScreen(),
          ),
          );
     },
     ),
     ),
);
}
}

class DetailScreen extends StatelessWidget {
@override
Widget build(BuildContext context) {
return Scaffold(
     appBar: AppBar(
     title: Text('Detail'),
     ),
     body: Center(
     child: ElevatedButton(
     child: Text('Go back'),
     onPressed: () {
          // Pop the current route off the stack to go back
          Navigator.pop(context);
     },
     ),
     ),
);
}
}
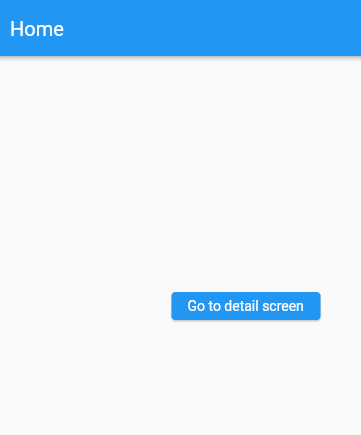
This code defines two screens: 'HomeScreen' and 'DetailScreen'. The 'HomeScreen' has a button that, when pressed, navigates to the 'DetailScreen' using the 'Navigator.push' method and a 'MaterialPageRoute'. The 'DetailScreen' has a button that, when pressed, goes back to the 'HomeScreen' using the 'Navigator.pop' method.

11. Flutter Asynchronus Programming
Asynchronous programming is a technique for writing code that can perform tasks concurrently, rather than sequentially. In Flutter, asynchronous programming is often used to perform long-running tasks or tasks that may take an indeterminate amount of time, such as making network requests or reading and writing to a database.
There are several ways to perform asynchronous programming in Flutter, including
1. async/await: The 'async' and 'await' keywords allow developers to write asynchronous code in a synchronous-style syntax. This can make it easier to read and understand asynchronous code.
2. Future: A 'Future' represents a value that may not be available yet. It can be used to perform asynchronous tasks and can be combined with the async/await keywords to make asynchronous code easier to write and read.
3. Stream: A 'Stream' is a sequence of asynchronous events. It can be used to perform tasks that need to be repeated multiple times, such as listening for changes in a database or displaying real-time data from a server.
Here's an example of using the async/await keywords to perform an asynchronous task in Flutter
import 'package:flutter/material.dart';

void main() {
runApp(MyApp());
}

class MyApp extends StatelessWidget {
@override
Widget build(BuildContext context) {
return MaterialApp(
home: HomeScreen(),
);
}
}

class HomeScreen extends StatelessWidget {
@override
Widget build(BuildContext context) {
return Scaffold(
body: Center(
child: FutureBuilder<String>(
future: getData(),
builder: (context, snapshot) {
     if (snapshot.hasData) {
     return Text(snapshot.data!);
     } else if (snapshot.hasError) {
     return Text('Error: ${snapshot.error}');
     } else {
     return CircularProgressIndicator();
     }
},
),
),
);
}
}

Future<String> getData() async {
// Perform a long-running task, such as making a network request
await Future.delayed(Duration(seconds: 3));
return 'Data';
}
This code defines a 'getData' function that performs a long-running task (in this case, waiting for 3 seconds) and returns a 'Future' that will eventually contain the string "Data". The 'HomeScreen' uses a 'FutureBuilder' widget to display a loading indicator while the 'getData' function is running, and then displays the result of the function once it's complete.
12. Flutter Networking
To perform networking operations in Flutter, you can use the http package. This package provides a simple way to make HTTP requests and receive HTTP responses in your Flutter app.
Here's an example of how you can use the http package to make a GET request to a JSON API and parse the response
import 'package:http/http.dart' as http;

void fetchData() async {
     final response = await http.get('https://example.com/data.json');

     if (response.statusCode == 200) {
     // If the call to the server was successful, parse the JSON
     final data = json.decode(response.body);
     print(data);
     } else {
     // throw an error if not successful.
     throw Exception('Failed to load data');
     }
}
This code makes an HTTP GET request to the specified URL, and if the call is successful (i.e. the server returns a 200 status code), it parses the response body as JSON and prints it to the console. If the call is unsuccessful (e.g. the server returns a 404 status code), it throws an exception.
You can also use the http package to make POST, PUT, and DELETE requests, as well as send data in the request body and set headers. For more information, you can check out the documentation for the http package
https://pub.dev/documentation/http/latest/
In addition to the http package, there are also other packages available for performing networking operations in Flutter, such as dio and chopper. You can choose the package that best meets your needs and use it in your Flutter app.
13. Flutter Persistence
In Flutter, persistence refers to the ability of an app to store and retrieve data even after it has been closed. There are several ways to add persistence to a Flutter app, including
1. Shared Preferences: The SharedPreferences plugin allows developers to save small pieces of data, such as strings and booleans, to the device's shared preferences file. This data is persisted even when the app is closed.
2. SQLite: The sqflite plugin allows developers to use an SQLite database to store and retrieve data in a Flutter app. SQLite is a lightweight, self-contained database engine that can be used to store large amounts of structured data.
3. Firebase: Firebase is a mobile development platform created by Google that includes a variety of services for building and deploying mobile apps. It includes a real-time database and various storage options, such as Cloud Firestore and Cloud Storage, that can be used to add persistence to a Flutter app.
Here's an example of using the SharedPreferences plugin to add persistence to a Flutter app
import 'package:flutter/material.dart';
import 'package:shared_preferences/shared_preferences.dart';

void main() => runApp(MyApp());

class MyApp extends StatelessWidget {
@override
Widget build(BuildContext context) {
return MaterialApp(
     home: HomeScreen(),
);
}
}

class HomeScreen extends StatefulWidget {
@override
_HomeScreenState createState() => _HomeScreenState();
}

class _HomeScreenState extends State<HomeScreen> {
String _text = '';

@override
void initState() {
super.initState();
// Load the text from shared preferences when the app starts
loadText();
}

Future<void>loadText() async {
SharedPreferences prefs = await SharedPreferences.getInstance();
setState(() {
     _text = prefs.getString('text') ?? '';
});
}

Future<void> saveText() async {
SharedPreferences prefs = await SharedPreferences.getInstance();
prefs.setString('text', _text);
}

@override
Widget build(BuildContext context) {
return Scaffold(
     body: Center(
     child: Column(
     mainAxisAlignment: MainAxisAlignment.center,
     children: [
          Text(_text),
          TextField(
          onChanged: (value) {
               setState(() {
               _text = value;
               });
          },
          ),
          RaisedButton(
          child: Text('Save'),
          onPressed: saveText,
          ),
     ],
     ),
     ),
);
}
}
This code defines a 'HomeScreen' with a text field and a button. When the button is pressed, the saveText function is called, which saves the current value of the text field to the device's shared preferences file using the 'SharedPreferences' plugin. When the app starts, the loadText function is called, which retrieves the saved text from the shared preferences file and displays it on the screen.
14. Flutter Animations
Flutter provides a variety of powerful APIs for animating widgets. With these APIs, you can animate the properties of a widget, such as its size, color, shape, and more.
There are several ways to create animations in Flutter. One way is to use the 'AnimationController' class, which controls the animation and generates a new value for the animation every frame. You can use the 'Animation' class to define how the animation should behave over time, such as how long it should take and how it should interpolate between values.
Here's an example of how you can use the 'AnimationController' and 'Animation' classes to animate the size of a widget
import 'package:flutter/animation.dart';

class MyAnimatedWidget extends StatefulWidget {
@override
_MyAnimatedWidgetState createState() => _MyAnimatedWidgetState();
}

class _MyAnimatedWidgetState extends State<MyAnimatedWidget> with SingleTickerProviderStateMixin {
AnimationController _animationController;
Animation<double> _animation;

@override
void initState() {
super.initState();
_animationController = AnimationController(
     duration: const Duration(seconds: 1),
     vsync: this,
);
_animation = Tween<double>(begin: 0, end: 1).animate(_animationController);
}

@override
void dispose() {
_animationController.dispose();
super.dispose();
}

@override
Widget build(BuildContext context) {
return AnimatedBuilder(
     animation: _animation,
     child: Container(width: 100, height: 100),
     builder: (context, child) {
     return Transform.scale(
     scale: _animation.value,
     child: child,
     );
     },
);
}
}
In this example, the 'AnimationController' is set up to run for a duration of 1 second and to generate a new value for the animation every frame. The 'Animation' is defined using a Tween, which specifies the range of values that the animation should interpolate between (in this case, 0 and 1). The 'AnimatedBuilder' widget rebuilds the child widget (a Container) with a new scale value every time the animation value changes.
To start the animation, you can call the '_animationController.forward()' method. You can also use the 'reverse()' method to run the animation in reverse, or the 'reset()' method to reset the animation to its starting value.
15. Flutter Gestures
In Flutter, gestures are interactive movements of one or more fingers on a touch screen. These gestures are used to interact with the app and perform various actions, such as tapping, double-tapping, long pressing, swiping, and scaling.
Flutter provides a set of widgets that can recognize gestures. These gestures include
1. onTap: Triggered when the user quickly taps the screen with a single finger.
2. onDoubleTap: Triggered when the user quickly taps the screen twice with a single finger.
3. onLongPress: Triggered when the user presses and holds the screen with a single finger.
4. onLongPressMoveUpdate: Triggered when the user moves his/her finger after long pressing the screen.
5. onScaleEnd: Triggered when the user starts or stops scaling (pinching) the screen with two fingers.
6. onScaleUpdate: Triggered when the user scales (pinches) the screen with two fingers.
To use these flutter gestures, you can wrap the widget you want to make gesture-aware with a GestureDetector widget.
GestureDetector(
onTap: () {
     // to do something   happen when the screen is tapped
},
child: Container(
     width: 200,
     height: 100,
     color: Colors.red,
),
)
This will create a red 'Container' that responds to tap gestures. When the user quickly taps the container, the 'onTap' callback will be called.
You can also use multiple gestures on the same widget by specifying multiple callbacks. For example
GestureDetector(
     onTap: () {
          // to do something  when the screen is tapped
     },
     onDoubleTap: () {
          // to do something something when the screen is double-tapped
     },
     onLongPress: () {
          // to do something something when the screen is long-pressed
     },
     child: Container(
          width: 200,
          height: 100,
          color: Colors.red,
     ),
     )
This will create a red 'Container' that responds to tap, double-tap, and long-press gestures.
import 'package:flutter/material.dart';

void main() => runApp(MyApp());

class MyApp extends StatelessWidget {
@override
Widget build(BuildContext context) {
return MaterialApp(
     home: GestureDetectorExample(),
);
}
}

class GestureDetectorExample extends StatelessWidget {
@override
Widget build(BuildContext context) {
return Scaffold(
     appBar: AppBar(
     title: Text('Gesture Detector Example'),
     ),
     body: Center(
     child: GestureDetector(
     onTap: () {
          print('Screen was tapped!');
     },
     onDoubleTap: () {
          print('Screen was double-tapped!');
     },
     onLongPress: () {
          print('Screen was long-pressed!');
     },
     child: Container(
          width: 200,
          height: 100,
          color: Colors.red,
          child: Center(
          child: Text(
               'Tap, double-tap, or long-press me!',
               style: TextStyle(color: Colors.white),
          ),
          ),
     ),
     ),
     ),
);
}
}
16. Flutter Custom Widgets
In Flutter, you can create your own custom widgets by extending the 'StatelessWidget' or 'StatefulWidget' class.
A 'StatelessWidget' is a widget that does not maintain any state. This means that it does not have any internal data that can change over time, and its appearance is completely determined by its properties (also known as constructor arguments).
A 'StatefulWidget', on the other hand, is a widget that maintains state. This means that it has internal data that can change over time, and its appearance is determined by both its properties and its state.
To create a custom 'StatelessWidget', you need to define a new class that extends StatelessWidget and overrides the build method. The build method should return a widget that represents the visual appearance of the custom widget.
Here is an example of a custom StatelessWidget that displays a red square
class RedSquare extends StatelessWidget {
     @override
     Widget build(BuildContext context) {
          return Container(
          width: 100,
          height: 100,
          color: Colors.red,
          );
     }
     }
To use this custom widget in your app, you can simply include it in the widget tree like any other widget
RedSquare()
To create a custom 'StatefulWidget', you need to define two classes: one that extends 'StatefulWidget' and one that extends 'State'. The 'StatefulWidget' class should define the widget's constructor and delegate the creation of the widget's state to a 'createState' method. The 'State' class should override the build method and return a widget that represents the visual appearance of the custom widget.
Here is an example of a custom StatefulWidget that displays a red square that can change its size when tapped
class ResizableSquare extends StatefulWidget {
@override
_ResizableSquareState createState() => _ResizableSquareState();
}

class _ResizableSquareState extends State {
double _size = 100;

void _increaseSize() {
     setState(() {
     _size += 10;
     });
}

@override
Widget build(BuildContext context) {
     return GestureDetector(
     onTap: _increaseSize,
     child: Container(
          width: _size,
          height: _size,
          color: Colors.red,
     ),
     );
}
}
To use this custom widget in your app, you can simply include it in the widget tree like any other widget
ResizableSquare()
Custom widgets are a powerful feature of Flutter that allow you to create reusable components that can be easily shared and customized in your app.
17. Flutter Integration with Native Code
Flutter is designed to allow developers to create cross-platform apps using a single codebase. However, sometimes you may need to integrate your Flutter app with native code, either to access functionality that is not available in Flutter, or to improve performance.
There are several ways to integrate Flutter with native code
1. Platform channels: This is the recommended way to communicate between Flutter and native code. Platform channels allow you to call native functions from Flutter and receive results or callbacks, using a simple and well-defined API. You can use platform channels to access native APIs, such as camera, geolocation, or device sensors.
2. Embedding Flutter in a native app: If you have an existing native app and want to add Flutter to it, you can use the FlutterViewController on iOS or the FlutterFragment on Android to embed a Flutter view in your native app. This allows you to reuse your existing native code and add Flutter features to your app incrementally.
3. Using native code in Flutter: In some cases, you may need to use native code directly in your Flutter app. For example, you may want to access a native library that is not available in Flutter, or you may want to optimize a performance-critical part of your app using native code. To use native code in Flutter, you can use the MethodChannel class to invoke native functions and receive results or callbacks.
18. Flutter Internationalization
Internationalization (i18n) is the process of adapting an app to support multiple languages and locales. Flutter provides a set of tools and libraries that make it easy to internationalize your app.
To internationalize a Flutter app, you need to follow these
1. Define a set of supported locales for your app. A locale is a combination of a language and a region, and is used to determine the language, currency, date and time formats, and other cultural conventions used in the app.
2. Extract all the strings that need to be localized from the app's code and user interface (UI) into a set of resource files. These resource files should contain the translations of the strings for each of the supported locales.
3. Use the 'intl' package to generate code based on the resource files. This code will provide easy access to the localized strings from your app's code and automatically select the appropriate strings based on the device's locale.
4. Use the 'Localizations' widget to make the localized strings available throughout the app. This widget should be placed at the root of the app's widget tree, and should be provided with a list of 'LocalizationsDelegates' that handle the loading and translation of the localized strings.
5. Use the 'Translate' and 'Translate.of' functions to access the localized strings from the app's code and UI.
Here is an example of how you can internationalize a Flutter app
import 'package:flutter/material.dart';
import 'package:flutter_localizations/flutter_localizations.dart';
import 'package:intl/intl.dart';

void main() => runApp(MyApp());

class MyApp extends StatelessWidget {
     @override
     Widget build(BuildContext context) {
     return MaterialApp(
          localizationsDelegates: [
          GlobalMaterialLocalizations.delegate,
          GlobalWidgetsLocalizations.delegate,
          ],
          supportedLocales: [
          const Locale('en', 'US'),
          const Locale('es', 'ES'),
          ],
          home: MyHomePage(),
     );
     }
}

class MyHomePage extends StatelessWidget {
     @override
     Widget build(BuildContext context) {
     return Scaffold(
          appBar: AppBar(
          title: Text(Translate.of(context).appTitle),
          ),
          body: Center(
          child: Column(
          mainAxisAlignment: MainAxisAlignment.center,
          children: [
               Text(Translate.of(context).helloWorld),
               Text(Translate.of(context).welcomeMessage(DateFormat.yMd().format(DateTime.now()))),
          ],
          ),
          ),
     );
     }
}
In this example, the app is localized for English (en) and Spanish (es). The 'localizationsDelegates' property of the 'MaterialApp' widget specifies the 'LocalizationsDelegates' that handle the loading and translation of the localized strings, and the 'supportedLocales' property specifies the supported locales for the app.
The 'Translate.of function' is used to access the localized strings from the app's code and UI. This function requires a 'BuildContext', which is provided automatically when the widget is built.
19. Flutter Accessibility
Flutter provides a set of tools and libraries that make it easy to build accessible apps. Accessibility refers to the design of software that can be used by people with disabilities, such as vision, hearing, mobility, or cognitive impairments.
1. Provide alternative text for images, buttons, and other visual elements using the 'semantics' property. This text will be used by screen readers and other assistive technologies to provide a verbal description of the element to the user.
2. Use appropriate contrast ratios between the text and background colors to ensure that the text is legible for users with low vision. You can use the Theme.of(context).brightness property to determine the brightness of the current theme and adjust the text and background colors accordingly.
3. Use appropriate font sizes and styles to ensure that the text is legible for users with low vision. You can use the TextTheme of the current theme to determine the appropriate font sizes and styles.
4. Provide keyboard navigation for users who rely on a keyboard or other assistive technologies to interact with the app. This can be done by using the focusNode and focusScopeNode properties of the widgets to specify the focus order and focus traversal of the app.
5. Provide appropriate feedback for user actions, such as visual or auditory feedback for button clicks or other user interactions. This can be done using the InkWell or RawMaterialButton widgets, which provide visual and auditory feedback when tapped.
Here is an example of how you can make a Flutter app accessible
import 'package:flutter/material.dart';

void main() => runApp(MyApp());

class MyApp extends StatelessWidget {
@override
Widget build(BuildContext context) {
return MaterialApp(
     home: MyHomePage(),
);
}
}

class MyHomePage extends StatelessWidget {
@override
Widget build(BuildContext context) {
return Scaffold(
     appBar: AppBar(
     title: Text('Accessibility Example'),
     ),
     body: Center(
     child: Column(
     mainAxisAlignment: MainAxisAlignment.center,
     children: [
          Semantics(
          label: 'Flutter logo',
          child: Image.asset('images/flutter_logo.png'),
          ),
          SizedBox(height: 20),
          Semantics(
          label: 'Button',
          hint: 'Double tap to perform action',
          child: RawMaterialButton(
               onPressed: () {
               // Do something when the button is tapped
               },
               child: Text('Button'),
          ),
          ),
     ],
     ),
     ),
);
}
}
In this example, the 'Semantics' widget is used to provide alternative text for the Flutter logo and the button. The label property specifies the main text for the element, and the hint property specifies a secondary text that provides additional information about the element.
The 'RawMaterialButton' widget is used to create a button that provides visual and auditory feedback when tapped. This widget is particularly useful for creating accessible buttons, as it provides a high-contrast visual feedback and an auditory feedback on tap.
20. Flutter Testing
In order to ensure the quality and reliability of a Flutter application, it is important to test the app thoroughly. Flutter provides a number of tools and libraries for testing, including
1. Unit testing: Unit tests are used to test individual functions or classes in isolation from the rest of the app. Flutter includes a built-in unit testing library called 'flutter_test'.
2. Widget testing: Widget tests, also known as integration tests, are used to test the behavior of individual widgets. Flutter includes a widget testing library called 'flutter_tes't, which allows you to build and interact with widgets in a test environment.
3. Integration testing: Integration tests are used to test the integration of different parts of the app. Flutter includes a library called 'flutter_driver' that allows you to drive the app from another process, allowing you to perform integration tests.
4. End-to-end testing: End-to-end tests are used to test the app as a whole, simulating real-world user interactions. Flutter includes a library called 'flutter_web_driver' that allows you to run end-to-end tests for Flutter web applications.
In addition to these built-in testing libraries, there are also a number of third-party testing tools available for Flutter, such as the 'mockito' library for mocking dependencies and the 'flutter _gherkin' library for writing tests in the 'Gherkin' syntax.
Thank You
Thank you for visiting webdevmonk for your Flutter tutorial. We are glad that you found our tutorial helpful and we hope that you were able to learn something new.
If you have any further questions or if you would like to delve deeper into the topic, we encourage you to visit our site again. We are constantly updating our content and we would be happy to help you understand Flutter even better.
Thank you for your support and we hope to see you again soon!